Access Control in eXist: Using XACML in eXist
Configuring XACML
eXist-db loads policies from the /db/system/policies collection. Policies may be manually created and uploaded to the policies collection, however, the builtin editor is recommended.
Note: Deprecation
The XACML functionality is marked as deprecated and should not be used for new projects. Please use the new ACL functionality that has been introduced in eXist-db v2.0.
Policies currently have a range index defined on their ids for possible lookup for policy references. There is a fulltext index only on Description elements. However, in the future, more indices might be defined in order to more efficiently restrict the possible policies applicable to a request. This information may be important if an administrator executes a query on the root or system collection that includes all subcollections.
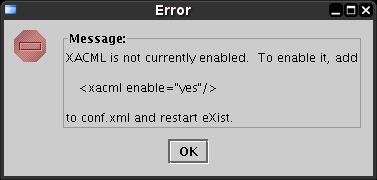
By default, access control through XACML is disabled. To enable it, add
<xacml enable="yes"/>to conf.xml. When XACML is enabled and no policies exist, it loads default policies. These policies generally allow as little access as necessary in order to run the examples and the unit tests. This behavior may be disabled by adding the attribute 'load-defaults' and setting it to 'no'.
<xacml enable="yes" load-defaults="no"/>
Managing XACML Policies
The administrator is responsible for providing policies that define the controls on access. This section describes how to manage policies in eXist.
All policies are stored in the /db/system/policies collection. The graphical editor will place all generated policies here. If you manually create your policies, you should put them here as well. If there are no policies in the policies collection when the XACML subsystem is initialized and the load-defaults attribute in the xacml element in the configuration file has not been set to "no", the default policies are loaded into the policies collection. There is nothing special about these policies once loaded: they are treated like any other policy and can be edited or removed.
Opening the Graphical Editor
To edit policies using the graphical editor, enable XACML as described in the previous section. Start the graphical client. The policy editor is displayed by selecting Tools->Edit Policies. If XACML is not enabled, you will see the following error message:
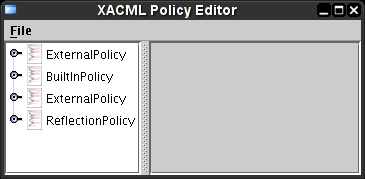
Once the editor is displayed, it should look like the following screenshot. (The window was resized to remove excess empty space in the screenshot and will be larger in practice.)
Basic Policy Editing
The left side of the split pane in the previous screenshot contains a tree structure with all of the policy documents in the /db/system/policies collection as the first level nodes. The immediate children of a policy are its target and rules. A target node has no children. A rule node has target and condition child nodes.
The editor for condition nodes is not yet implemented.
The policy hierarchy is reflected in the next screenshot.
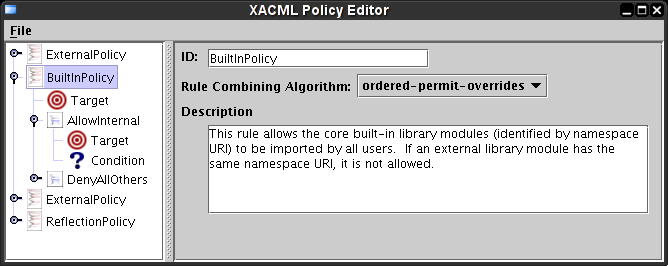
Here, the policy with ID 'BuiltinPolicy' has been selected. The right side of the split pane displays editable information about the policy. The ID should be unique among all top level policies (this is not currently enforced by the editor). The description should provide a brief overview of what restrictions the policy is supposed to provide.
Any changes to the information on the right side marks the policy as modified. This is indicated by a darker background for the node on the left side.
Editing a Target
The graphical editor represents the Target section as a table for each type of attribute. The different types are tabs in a tabbed pane. The next screenshot shows the Resource section selected. The table associated with each attribute type represents a group of attributes as a row. Every attribute in this row must match a request for the row to match the request and at least one row must match the request in order for the type (Subject, Resource, or Action) to match the request. Each type must match the request for the whole Target to match the request.
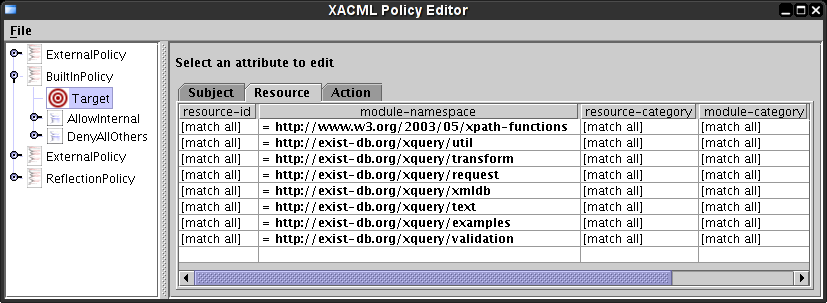
If the comparison for an attribute is unspecified, all requests will match that attribute. To edit the comparison for an attribute, select the desired cell. As shown in the following screenshot, the cell editor is displayed above the table. The cell editor shows the name of the attribute being edited and its data type. The first drop down list selects the comparison. The second drop down list selects the value against which the attribute should be compared.
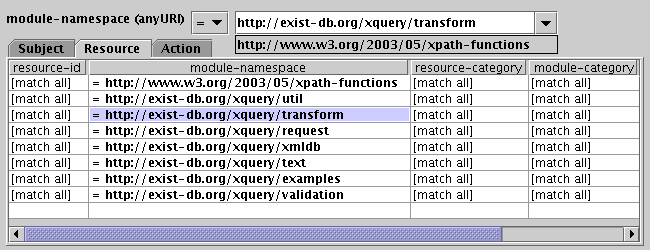
In this case, the "module-namespace" attribute allows the namespace to be typed in or the XPath functions namespace may be selected from the drop down list.
TODO: finish Target section
TODO: finish Managing Policies section